
Why Migrate Hosting from GoDaddy to Cloudways?
I used GoDaddy hosting for years and this was mainly because Godaddy is where I registered my first domain name. This was about 10 years ago and I didn’t really have any idea what I was doing or what website hosting even was. In the end, Godaddy served it’s purpose and is not a terrible option for beginners and they do actually offer decent customer support.
But once my sites started getting bigger and more complicated, GoDaddy’s Shared Servers just weren’t able to handle the work load.
Using WordPress and Woocommerce really slowed down my sites and after spending hours trying to optimize them and speed them up, I realized that the one thing I could never optimize was the server response time.
This is determined solely by your hosting provider and GoDaddy has shared hosting with many other sites on the same server which ultimately slows down your site.
Here’s a comparison of the response times of my site with Godaddy and Cloudways. You can see that the files are the same size and it takes Godaddy almost .7 seconds to respond while it takes Cloudways about .2 seconds. .5 seconds might not seem like a lot of time but it can really make a difference when users are on your site.
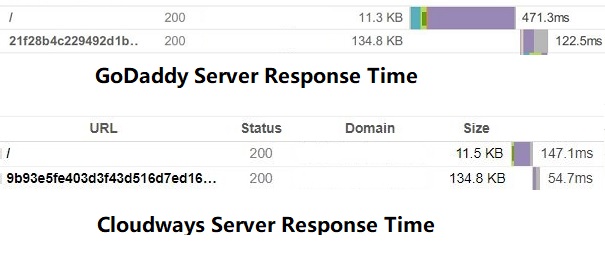
Cloudways vs Godaddy Server Response Time
After spending days trying to optimize my site and speaking to experts, I was led to which uses Digital Ocean Servers.
I switched over to their servers with a 3 Day Free Trial and tested out the speeds once I migrated my site. My site was instantly faster with their plan that cost $22.00/month compared to the $49.99/month I was paying with Godaddy.
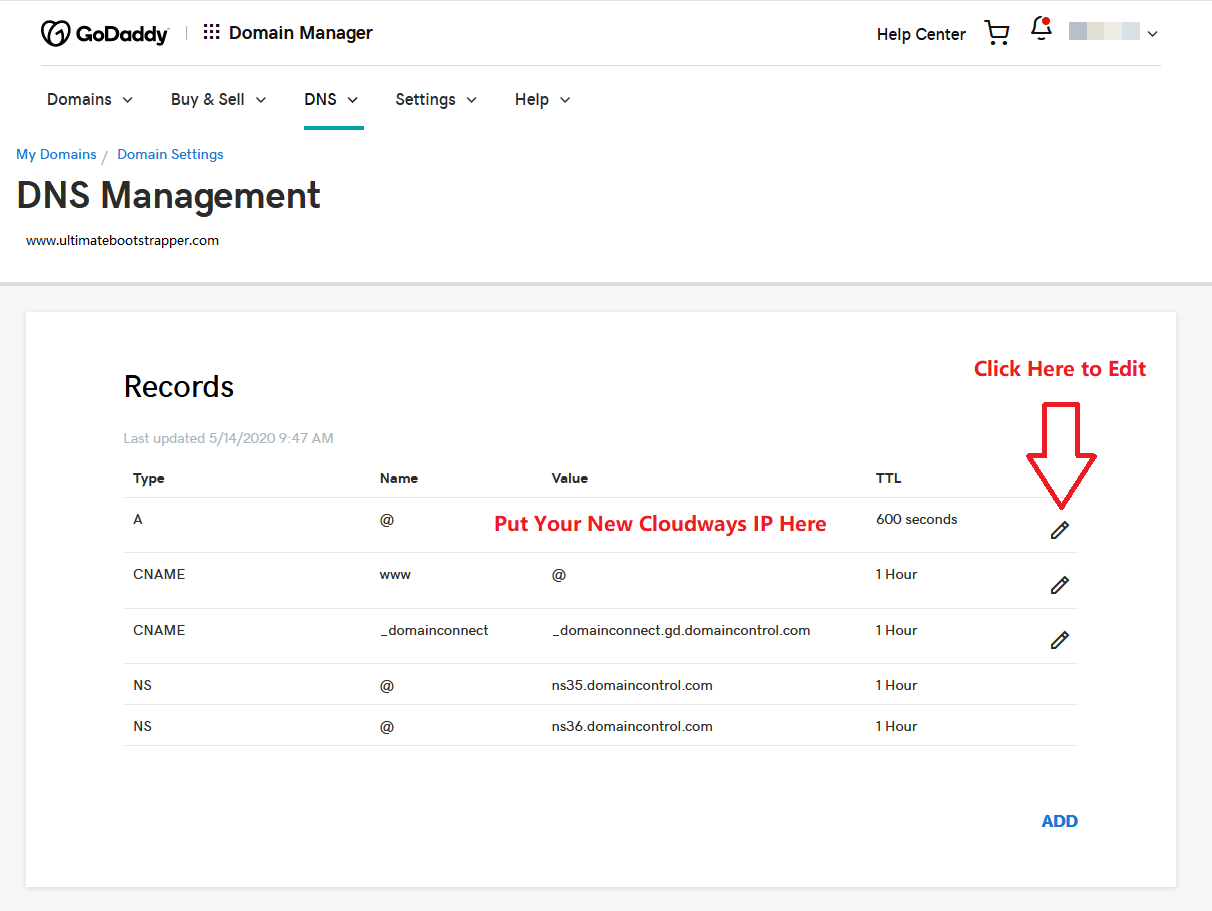
Godaddy Domain Management
Now in Godaddy, click on Domains and then DNS Management.
Change the IP Address in the A Records to your NEW Cloudways IP Address.
The largest improvement was actually on the backend. Using GoDaddy and WordPress made adding pictures and modifying products/posts a tedious experience where I could only do one thing at a time while I waited for the site to respond. Switching to Cloudways made a huge difference and now I can edit and optimize my site at my speed instead of waiting for GoDaddy’s servers to respond to my requests.
In short, Cloudways is cheaper and faster.
But you don’t have to just take my word for it, you can try out their servers for Free For 3 Days to test it out for yourself.